What should I do if I over or underwater my Taro?
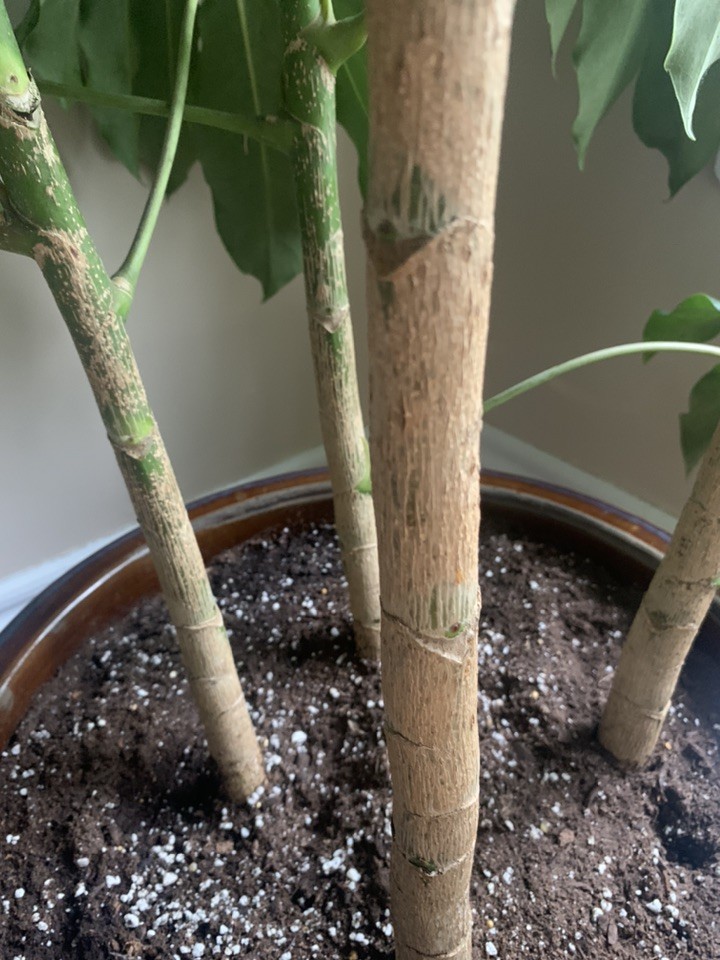
Overwatering is all too easy with the Taro. It doesn’t require a lot of water in the first place and overwatering can lead to bulb rot. Some symptoms include: -Mushy bulb -Spotted, flopping stems -Droopy flowers -Yellowed stalk It is normal for yellow leaves to develop when Taro has reached the end of their blooming period. However, if the leaves turn yellow before the flowers have bloomed, it is a sign of over watering. Bulb rot is common and cannot be reversed, unfortunately. If you catch it early on, you will need to dig up the bulb and carefully remove the rotten portions. From there, you should remove all the soil that the plant grew in. If you use a pot, thoroughly disinfect it and any tools you use to avoid spreading the fungus. For outdoor plants, you should plant them in a different location. There’s not as much of an issue if you underwater this plant. Of course, you don’t want the soil to dry out entirely, but it’s much easier to solve an underwatering problem than an overwatering one. Some signs that your plant is underwatered include: -No blooms -Sagging, wizened stalks -Browning around the edges of the flower petals If you have given your Taro too little water, then do not panic. It has a level of drought tolerance. Once you have realised, give it a good drink but do not saturate the surrounding soil. Just make sure it is moist.But do not give them too much and overwater them, you just need to let the soil to be mosit. Extended periods in water can lead to root rot and fungus growing on the bulb. The fungus can cause serious damage to the bulb which is noticed through spots that appear on the leaves and buds. The tips of the leaves may also discolor and die.
![more]()
How often should I water my Taro?
Taro is fairly hardy and doesn’t need a ton of attention. While you can grow it in a pot, it does the best grown directly into the ground in the hottest/brightest part of your garden. Since this is a bulb plant, you’ll need to be extra careful about overwatering while the plant is growing as it will rot the bulb. Once you have planted your Taro, water them well once and then leave them. That initial watering will kick start their growth, but after that you can leave them be until you see shoots appear. For the best results, you’ll want to check the moisture of the soil after the growth of new leaves. Put your finger about an 2-3 inch below the surface of the soil. If it’s still wet, you don’t have to water the plant. For potted plants, you should also check the water collection train to see if there’s any standing water. If there is, you should avoid watering the plant. For a more accurate moisture reading, stick a moisture sensor about 2-3 inches into the soil. The reading should be in the middle of the ‘moist’ category. The recommended frequency of watering your Taro is once per week.
![more]()
How can I adjust my watering for different conditions for my Taro?
The Taro is a hardy plant and can survive a variety of harsh conditions. If you plant outdoors, you can usually get away with letting mother nature take the reins. It doesn’t require much in the way of water maintenance and can survive long periods of drought. You should just make sure that the soil you plant it in provides adequate drainage. When it comes to potted Taro, you need to be a bit more careful with your watering. Since this is a bulb plant, it is prone to bulb rot if it is overwatered. You can get away with watering your plant less inside. And, of course, make sure your pots have proper drainage holes! Use good quality, well-drained soil. Add some sand or rocks to increase drainage. The most you’ll be watering the Taro is during its growing phase. You should water about one inch per week to encourage the flowers to bloom. Withhold water until the stalk appears and then begin watering as normal. Of course, how much you water during the growing phase also depends on the overall humidity and temperature. If you live in a hot, dry climate, the water will evaporate faster so you might need to water your Taro more often. If you’re in a more humid climate, you can probably water your Taro less. Always check the soil moisture level to make sure it’s not too wet. These plants prefer well-drained, moist soil.
![more]()
Is pruning necessary for my Taro?
It is helpful to lightly prune this plant periodically during the spring and summer. When performing this light pruning, you should search for leaves that have wilted, become discolored, show signs of disease, or have died completely. Remove dead or damaged leaves by cutting their petioles, or trimming off stems that have died. This will increase the light and ventilation of the plant and help it to grow. Some gardeners also choose to remove the flower buds of the Taro. However, removing flower buds before they open is a strictly aesthetic decision that will emphasize the beauty of this plant’s showy leaves.
![more]()
When should I prune my Taro?
You can prune your Taro any time you notice dead, diseased, or damaged leaves during the growing season. Once you notice such a leave, locate an unwanted leaf, then follow its stem all the way to the bottom of petiole. Removing dead stems will increase the light and ventilation of the plant and help it to grow. you can cut its stem just above the soil’s surface to remove it. Such pruning can take place as needed during spring and summer. Also, this plant can bloom any time between spring and fall, and some gardeners choose to remove flower buds before they have a chance to open. Removing unopened flower buds allows this plant to focus most of its growing energy on its beautiful leaves. However, pruning in this manner does not necessarily influence the plant’s overall health.
![more]()
How do I prune my Taro?
Pruning the Taro is as easy as waiting until you notice dead or damaged leaves on your plant. When you recognize these leaves, equip yourself with a pair of sharp and sterile hand pruning shears. Hand pruning shears will work best as larger tools like loppers will not be well suited to the precise cuts you need to make. Once you have a proper set of pruning tools, locate an unwanted leaf, then follow its stem all the way to the bottom of petiole. Removing dead stems will increase the light and ventilation of the plant and help it to grow. Cut the stem just above where it exits the soil to remove it entirely. If you wish to stop this plant from flowering, you can use the same pruning shears to remove any buds before they open. Finally, you may prefer to just trim off dead or damaged portions of the plant, including deadheading spent flowers, to keep it looking its best. This can be done at any time of year. Diseased or damaged stems should be cut right at the soil line and removed completely. Blooms should be cut off just below the flower head.
![more]()
What should I do after pruning my Taro?
Since pruning for the Taro should take place periodically throughout the season, what you do after pruning can vary. For instance, if you prune to remove selected leaves and stems from your Taro, you won’t need to do anything except continue your regular maintenance routine. At times, you may choose to remove healthier leaves and include them in a display of cut flowers and foliage. However, there is no crucial maintenance task to perform for this plant after typical pruning. The only thing to note is that when watering after pruning, you need to be careful not to touch the wound to prevent fungus from infecting the plant through the fresh wound. Placing Taro in a well-ventilated location will also help the wounds to dry out and heal in time. The timely replenishment of Taro after pruning will help the Taro to recover as soon as possible.
![more]()
Are there any important tips when pruning my Taro?
For your major pruning, use sharp pruning sheers that will make clean cuts to avoid damaging your plants. As you are pruning your Taro, step back occasionally to check the appearance of the plant to make sure it has the shape you want and that you are pruning it symmetrically. If the overall growth of the plant is weak, the flowers need to be pruned back in time for flowering to be able to save nutrients for leaf growth and allow the plant to grow more vigorously.
![more]()
How much sunlight does Taro need to grow?
Exact needs vary, but a minimum of 6 to 8 hours per day is a good rule of thumb for Taro to grow and produce fruit.
![more]()
What type of sunlight does Taro need?
Taro requires full sun, meaning that it should be grown in a location that gets direct sunlight that isn’t blocked by obstacles such as trees, fences, or buildings. In general, the faster the plant grows, the more hours of sunlight it will need. Morning sun is best for photosynthesis.
![more]()
Should I protect Taro from sun exposure?
Taro should not need to be protected from the sun in most climates. Those who live in a desert or near the equator may find that the sun is too harsh for the types of plants they want to grow, but this is the exception.
![more]()
What will happen if Taro doesn't get enough sunlight?
All plants need sunlight to convert into energy. Plants that have a short growing season need even more light and energy than those that grow slowly, as they need to complete all their processes to grow and produce fruit within just a few months. The first symptoms of insufficient sunlight in Taro are pale and yellow leaves that are not able to generate enough chlorophyll to keep their healthy green color. The leaves may eventually fall off, and new growth is small and weak. The plant may become leggy and sparse as it stretches toward the available light. Finally, without enough light the plant will not be able to produce large, high-quality edible leaves or fruit. Taro needs to devote a lot of energy into growing leaves and fruits, so if there isn’t enough light available for it to convert, the harvest will suffer.
![more]()
What will happen if Taro gets too much sunlight?
Taro can get sunburned from intense sunlight, especially when coupled with high temperatures and not having enough water. Afternoon sun tends to be most likely to burn plants. Scalded leaves develop faded patches of light brown to white on the areas at the top of the plant that are exposed to the most sun. They are especially vulnerable to this right after being transplanted from a shadier location to being in full sun. Transitioning plants gradually or providing them with a barrier while they are adjusting can help prevent sunscald in young plants. In many cases, Taro develops leaves that are large enough to protect fruits from the strongest rays of the sun. However, if intense sunlight is in contact with fruits, they can also be damaged. Avoid over-pruning those protective leaves so that the fruits don’t get burned.
![more]()
Are there any cautions or tips for sunlight and Taro?
Taro may become unbalanced if it gets significantly more light on one side than the other. Ideally, you can plant your Taro in a location away from obstacles that might block light, and where the distribution of sunlight is even on all sides. Be careful about planting tall species next to those that grow closer to the ground. It may not be obvious when the crops are first planted, but over time the taller plants may begin to block the amount of sunlight that can reach the shorter plants. Morning sun helps to dry dew and precipitation, which helps prevent infection from diseases that can develop when water sits on the plant. If you are watering or irrigating your Taro, this should be done in the morning.
![more]()
What is the optimal temperature for Taro?
There is an ideal temperature range that makes Taro feel at home. Under these temperature conditions, it's unlikely that you’ll have any issues with cold or hot damage to the foliage, but changing leaf colors can absolutely be a sign that Taro isn’t happy. Try to keep your Taro well within its preferred range of 70-85℉(21-30℃), but don’t panic if the temperature creeps up past 85℉(30℃) during the day or down to 70℉(21℃) at night.
![more]()
How can I protect Taro from extreme temperatures outdoors?
If your Taro happens to be planted outside, then there’s not much you can do to try to move it indoors. However, you can certainly provide cover in ways that will help it survive any extreme temperatures that may arise unexpectedly. For instance, you can always use a few stakes and some cloth to put together a shade tent that will block out much of the sun’s intense heat from direct sunlight exposure. Similarly, Taro can be protected from the extreme cold and especially chilly winds by building a small greenhouse around the plant, which will create a greenhouse effect and warm the plant up. This can be done using garden stakes and any sort of clear or translucent plastic you may have around; if you have greenhouse plastic such as polycarbonate laying around, this works perfectly. Remove the greenhouse once temperatures warm up to 40℉(10℃) at night.
![more]()
Does Taro need different temperatures in different seasons?
Generally speaking, Taro needs to stay within its preferred temperature range all year long. However, that doesn’t mean that care should stay the same all year long. During the warmest months of the year, Taro will need a little extra shade and a bit more of a breeze to help it cope with the hottest days. On the other hand, it may need to be moved away from chilly windows and doors during the cooler months in climates where temperatures drop below 40℉(10℃) at any point in the year.
![more]()
What is the best way to maintain the right temperature for my Taro?
Keeping your Taro at the right temperature can be fairly simple. Depending on where you grow it, Taro can be fairly easy to accommodate. For indoor growing, you can easily move the plant to different locations within your indoor space that best meet its temperature requirements. Avoid placing it near air conditioning vents, heaters, doors that open frequently, or drafty windows. It is a little more difficult to control the temperature around your Taro if it’s grown outside. Of course, if it’s planted in a pot, you can simply bring it indoors when the temperatures outside get too hot or too cold for Taro, but otherwise, you may need to take different measures to protect it from extreme heat or cold that may damage it irreversibly. Try placing Taro under cover to protect from both the harsh sun that can overheat it and any cold wind that could be potentially deadly for your plant.
![more]()
Why do I need to fertilize my Taro?
Taro typically grows quickly, and uses a lot of energy to create the root vegetables we enjoy. Along with sunlight, oxygen, and water, Taro species require nutrients to grow and produce roots. While these nutrients are generally present in garden soil because of the natural organic matter decomposition in and on top of the soil, there may be some cases where the nutrients are not abundant enough to support healthy Taro growth. In these cases, fertilizer provides the boost that the Taro needs.
![more]()
When is the best time to fertilize my Taro?
Apply natural fertilizer to your soil to prepare it for planting. There is no particular time frame you are required to follow, but be sure you have enough time to incorporate the fertilizer into the soil and water it thoroughly before putting seeds or seedlings in the ground. In general, one application of fertilizer is enough to keep Taro growing well throughout the season, but you can do one additional application once the seedlings have started to establish themselves if you want to boost their yield even more. Just be careful not to use too much fertilizer that could damage the plants.
![more]()
When should I avoid fertilizing my Taro?
Avoid fertilizing when conditions are dry, and always water plants thoroughly after fertilizing. All types of fertilizer are most effective when delivered through moist soil. Don’t use high-nitrogen fertilizers unless developing a lot of foliage is more important to you than the root crops. Be careful not to let fertilizer touch the base of the plant or splash onto leaves or stems, since this can cause the plant to burn.
![more]()
What type of fertilizer does my Taro need?
Most people grow Taro in order to harvest the roots, although in many cases the foliage is also edible. To promote a healthy root system, choose a fertilizer with more phosphate and potassium compared with the amount of nitrogen. Bone meal and kelp are great choices for natural fertilizers, but chemical fertilizers can also be used. Just make sure the fertilizer doesn’t contain a large amount of nitrogen, since that is a less important nutrient for this particular vegetable. The best way to determine what type of fertilizer to use for growing Taro is to take a soil sample from the part of your garden that you are planning to use. Testing the soil will tell you which nutrients are needed, along with other important factors such as density and pH level. All of these factors contribute to your plant’s success, so it is a good idea to think of it holistically and treat the soil accordingly.
![more]()
How do I fertilize my Taro?
Fertilize Taro by mixing an organic fertilizer such as bone meal or kelp into the soil prior to planting. If you need to fertilize again during the season, do so by using a layer of compost or well-rotted manure as mulch around (but not touching) the base of your Taro. This material will break down gradually, allowing nutrients to soak through to the roots below. For liquid fertilizers, dilute the fertilizer with water according to the instructions for your particular crop and spray it on the ground around the Taro, being careful not to splash the plant. Granular fertilizers can be sprinkled around the base of the plant or between rows, or worked into the top layer of soil to keep the granules from being washed or blown away.
![more]()
What happens if I fertilize my Taro too much?
Too much fertilizer (especially chemical fertilizer) causes the plant to become stressed. Fertilizer burn is caused by excess salts that are contained in chemicals, which can dehydrate plant cells and cause yellowing and wilted foliage. Be aware that fertilizer burn symptoms can also look very similar to other issues including nutrient deficiency, so be sure to consider all the factors when diagnosing the issue with your Taro. Too much nitrogen fertilizer can cause energy to be diverted to foliage growth, leaving the roots and other parts of the plant with less resources. This can be especially disappointing when harvesting a plant that looks very healthy and vigorous above the ground, since the produce it creates doesn’t match its appearance.
![more]()
![icon]()
Get tips and tricks for your plants.
Keep your plants happy and healthy with our guide to watering, lighting, feeding and more.
Download the App for Free